Mobile Shopper for Android
I thought that existing grocery shopping apps requried too much tapping and text entering, and many contained features I didn't need, so I decided to write my own.
MobileShopper for Android works on all versions of Android OS from 7.0 and up, supporting all known screen sizes. It is lightning fast, and the only text entry you need to do after you have the data the way you want it is to enter a quantity and price (optional) for items you need.
The application allows you to create as many independent lists as you like, creating a list for groceries on first launch.The grocery shopping list contains many common categories and items. When creating your own shopping list, you can choose to have it pre-populated or left empty for you to add your own data. There is currently one choice for pre-population, which is the grocery list you get when the application is first launched.
The data can be modified at will - you can add, delete and rename as you like.
MobileShopper provides an "Action Bar" across the top of every view. The action bar contains the application title and a subtitle (typically naming the current subview). On the main views it also contains an "Action Item" on the right and tabs used to navigate between those views. The action item is called Lists, and is an icon that when tapped brings up a spinner for selecting the shopping list to view (or to add, rename or delete one). There is also an "Overflow" menu at the top right, containing items for navigating to secondary views.
New With Version 3.4.10 and Later
The following are the new features in version 3.4.10 and later of MobileShopper:
Shop using just your Wear OS Smartwatch!
Mobile Shopper now has a Wear OS companion app called MobileCart! The new app works on watches that support Wear OS 3.0 (API Level 30) and watches that use Wear OS 2.0, e.g., the Samsung Galaxy Watch4.
Create your shopping list like normal, getting the items you need populated in MobileShopper's NEEDED ITEMS tab, then open MobileCart on your Smartwatch, and it will retrieve that data, display it on your Smartwatch, and let you use it just like you would use the NEEDED ITEMS tab in MobileShopper!
Keep your mobile device in your pocket or purse, and shop using just your Smartwatch!
See the Mobile Cart section in the left side navigation for details.
Android minimum version changed
MobileShopper now requires Android 7.0 (API level 24) or later.
Overall Design
MobileShopper's main concept is that of a list. The application comes pre-loaded with one list, a grocery list. You can create any number of other lists. You switch between different lists, create new lists, rename lists or delete lists using the Lists action item (an icon in the upper right corner). All of the data in a list can be modified as you like.
Each list has four main components, each displayed in its own view: a list of settings, a list of item categories, a list of recipes and a list of needed items. The settings are displayed in the settings view, while the other three components are displayed in their own tabs in the main view. Each item category contains an open-ended number of items, and each recipe contains an open-ended number of recipes. Each recipe consists of a list of ingredients and (optionally) textual instructions. The tabs can be accessed by tapping on the desired tab, or by using a swiping motion left or right to scroll the desired tab into view.
Every view has menu items (shown in the options menu on devices that have one, or the "overflow" menu on those that don't). Practically everything can be tapped to perform an operation, such as viewing its contents. List entries with an icon on the left also have a "quick action bar", obtained by tapping the icon.
Main Display, Categories Tab
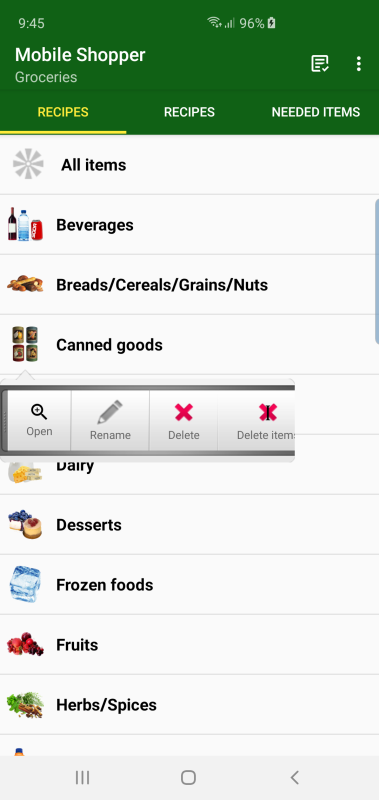
Below is the main display's categories tab, with the options menu open on the left, and a quick action bar open on the right. This shows all the item categories in the current list.

Main Display, Recipes Tab
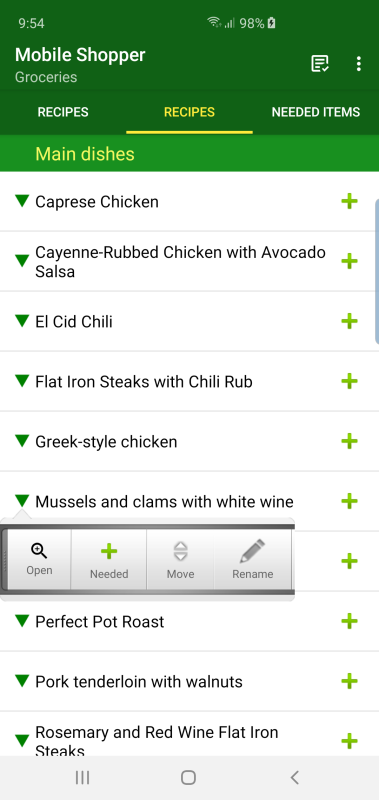
Below is the main display's recipes tab, with a quick action bar open on the right. This shows all the recipes you have defined. At the top is a spinner control for choosing a recipe category. You can add a recipe using the Add menu item, and use the quick action menu (obtained by tapping on the down arrow icon) to perform an operation on a specific recipe.

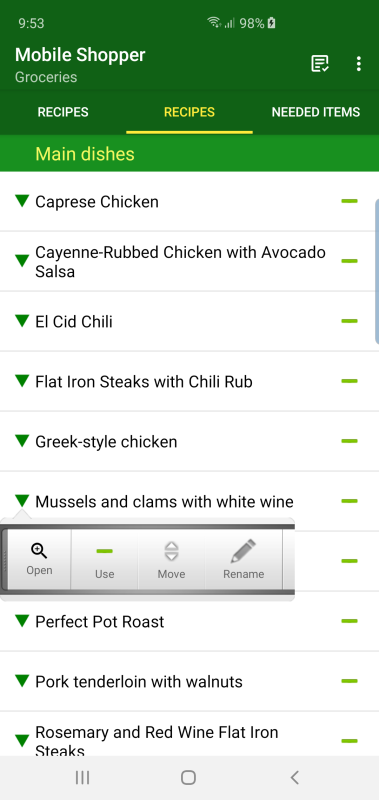
Below is the same view in Shopping inventory interaction style. Instead of a checkbox on the right, there is a minus sign icon, standing for "use".
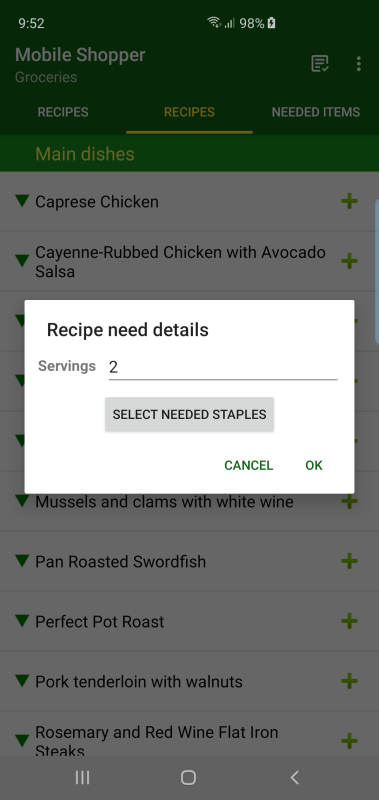
Tapping on the icon on the right of a recipe brings up a dialog (shown below) in which you can specify how many servings you need for that recipe and a button for selecting the recipe ingredients marked as staples that you need. Based on that information, MobileShopper adds all the recipe ingredients to your needed list automatically (properly scaling the recipe per your specified number of servings).
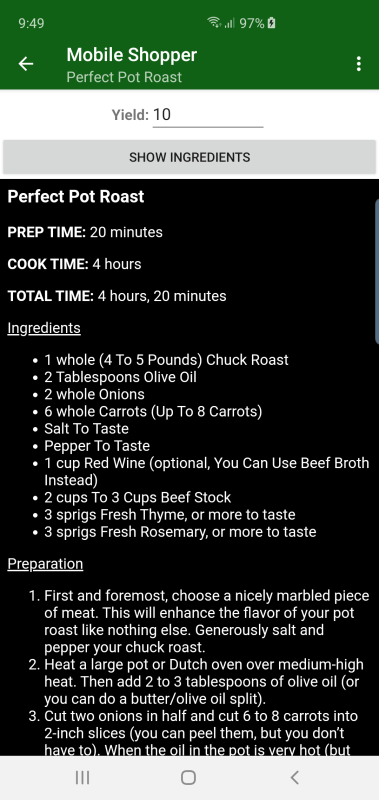
By tapping on a recipe name, you get a list of the ingredients in the recipe as shown below, along with a field for specifying the yield of the recipe (in servings). If you have included a matching file (please see the FAQ for details) on your external storage, a Show instructions button is displayed.

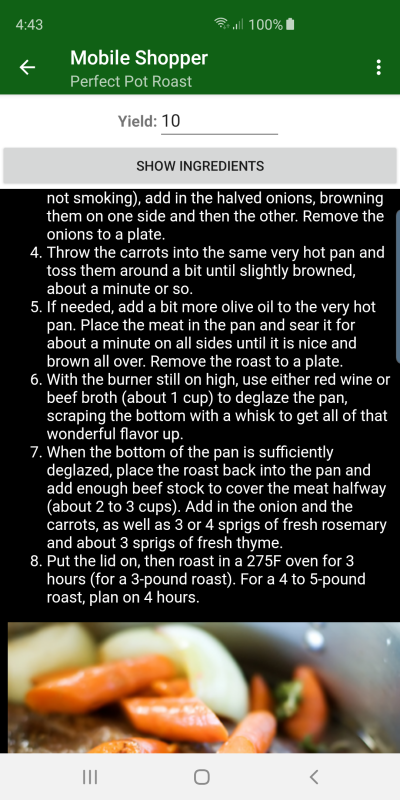
Tapping that button yields the display on the left below. If your
instructions include a photo, it could look like the display on the
right. The same button (now labeled Show ingredients)
can be tapped again to return to the ingredient list.
Main Display, Needed Tab
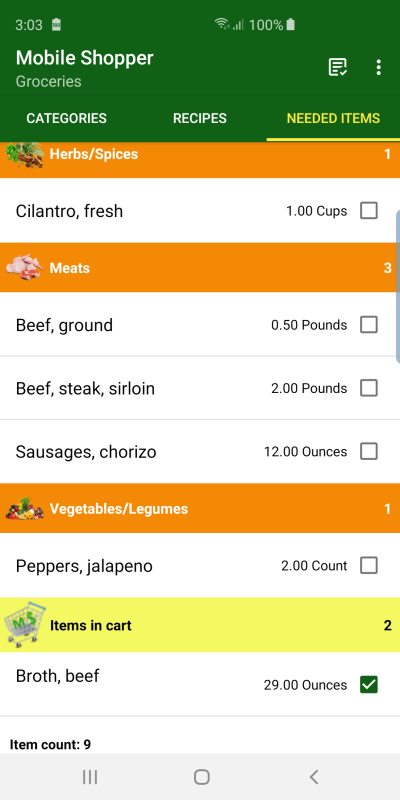
Below is the main view's needed items tab. It shows the items you have marked as needed, grouped by category. The checkbox indicates whether an item has been placed in your cart or not. When checked, the item is placed in a special divider labeled "Items in cart", which appears as black text in a yellow box at the bottom of the list. Unchecking an item there puts the item back in the category it was originally in. Each divider shows the category name and the count and sum of the prices (both optional) of the items in that category. At the bottom of the list is a footer, always visible, which shows the total item count and total price (optional) of all items.
Category Items View
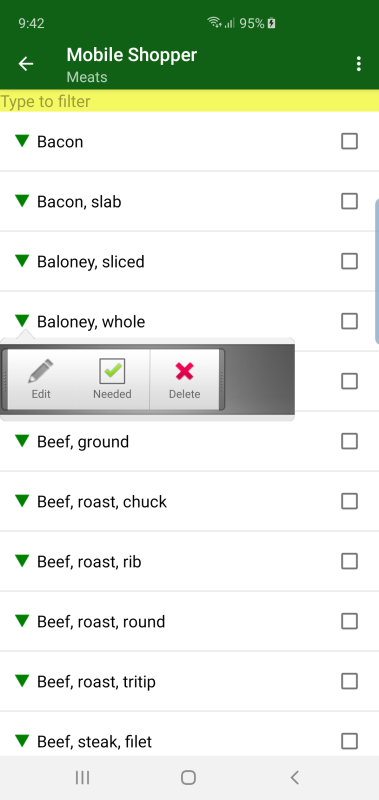
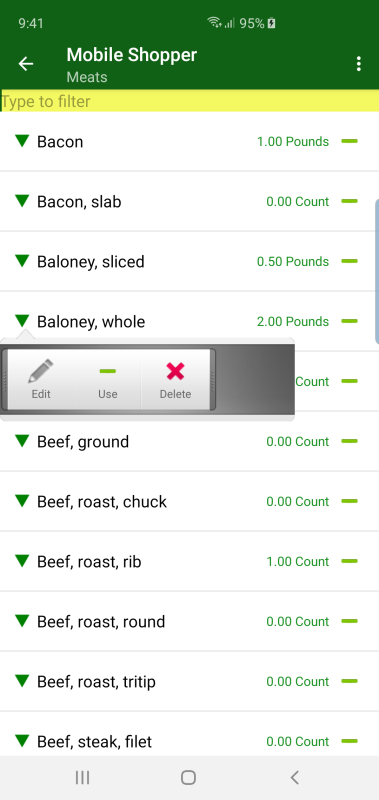
Below is the category items view (for the "Meats" category), with a quick action bar open on the right. On the top is a text field you can use to filter the list by what you type in it.
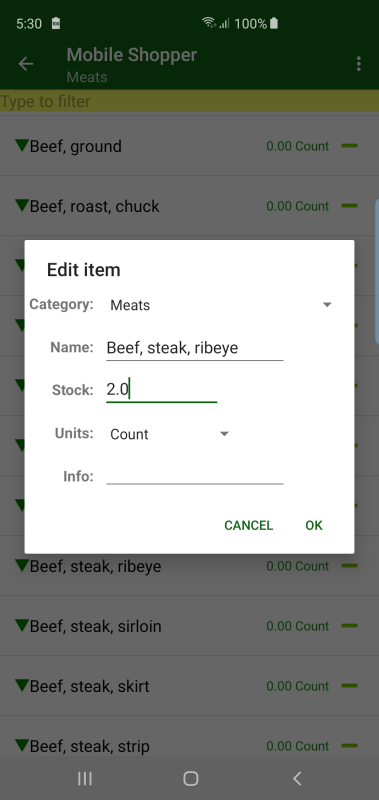
Below is the same view in Shopping inventory interaction style. Instead of a checkbox on the right, there is a minus sign icon, standing for "use". Tap that icon to bring up a dialog in which you can specify the quantity and units of that item you are using or taking out of stock. To enter the quantity you have in supply/stock, tap on the item name or use the Edit quick action to bring up the dialog shown on the right. You can also add any textual information you like in the Info field.
Item Details, Use Dialog
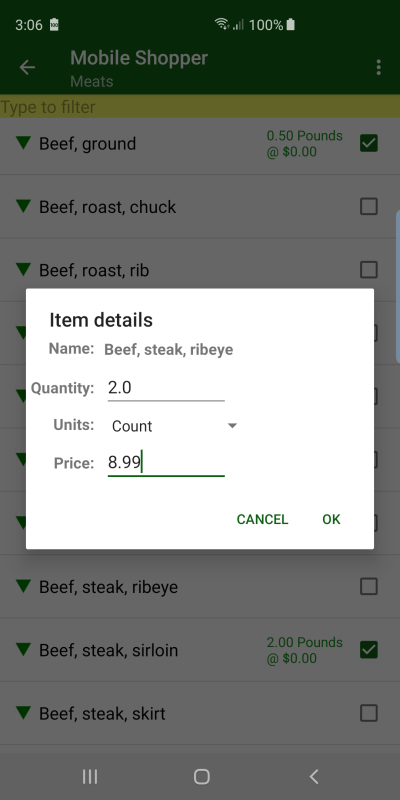
Below on the left is the item details dialog, obtained by tapping the checkbox for ribeye steak from the "Meats" category items view. This lets you specify the quantity, units and price for an item. After tapping the OK button, the values you have chosen appear to the left of the checkbox. This dialog appears in shopping list interaction style.
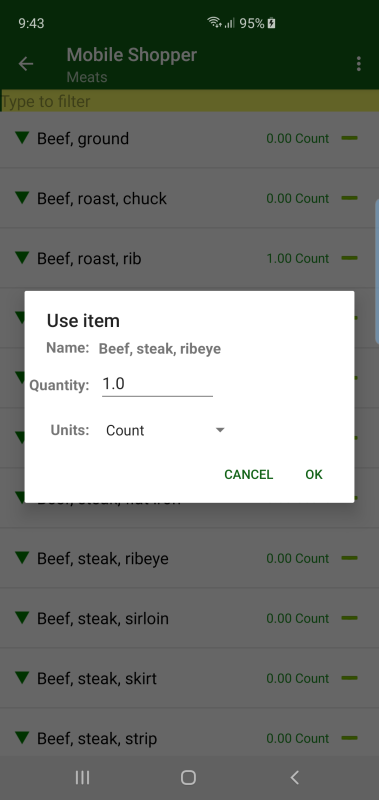
On the right is the "use item" dialog, obtained by tapping the "use" icon for ribeye steak from the "Meats" category items view. This lets you specify the quantity and units for an item you are using. This dialog appears in the inventory interaction styles.
Settings View and Subviews
Below on the left is the settings view. A very useful aspect of the settings is that they are unique to the list that is currently selected in the main view's Lists action item. That means that you can have different settings for each list. MobileShopper has several categories of settings that let you customize various aspects of the application.
In the Basic category you can choose an interaction style. The available styles are Shopping list (the default), Shopping inventory or General inventory. The inventory styles let you use your data as an inventory of your existing supply or stock of items. Instead of checking an item off to indicate it is needed, you "use" it by tapping on a minus sign icon (see previous sections). The only difference between Shopping inventory and General inventory is that recipes are called "bundles" instead. Related to this setting is the one below it labeled Inventory item needed event. Enabled only when one of the inventory interaction styles is chosen, you can choose On out of stock or On use. The latter choice causes used items to appear in your needed list immediately on use, while the former choice causes them to appear only when the quantity in stock of an item drops to zero.
In the Display category you can choose to show or not show item details and prices and elect to use category icons you provide.
In the Configuration category (shown below on the right) you can configure the item units (add, delete, reorder), reorder the shopping aisles (the categories as they appear in the needed items tab) and configure recipe/bundle categories.
In the Support category you can send support data to me if you have found a bug in the program.
In the Privacy category you can enable or disable crash reporting and view the privacy policy.

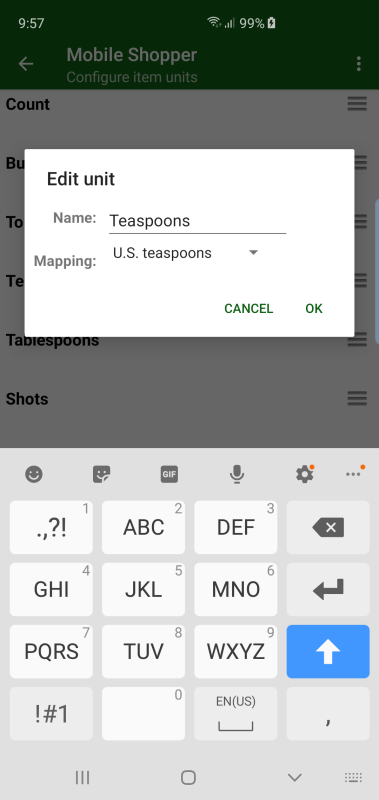
Below on the left is the dialog for configuring the units available for specifying item quantities, with the options menu open. To add a unit, use the Add menu item. To rename a unit or delete a unit, tap on the unit and choose Rename or Delete from the resulting quick action bar. The Rename choice becomes Edit in the inventory interaction styles. Use of the Edit action allows you to specify the mapping between the units you have defined and standard units, which is required for MobileShopper to perform conversion between different units.The Edit dialog is shown on the right.
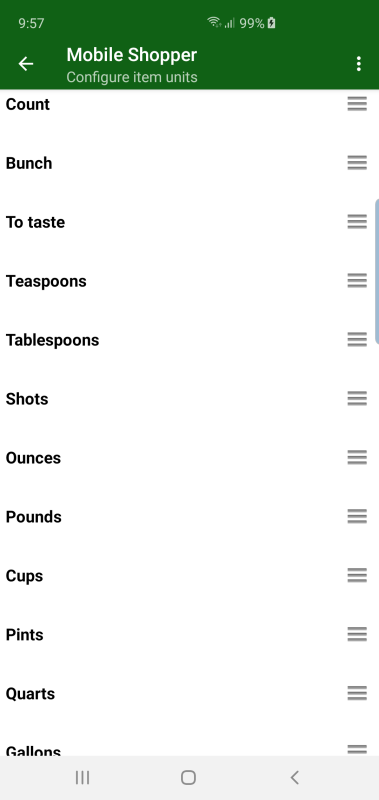
You can also change the order of the units by tapping and holding on the drag icon on the right hand side, dragging to the desired position, then dropping it.
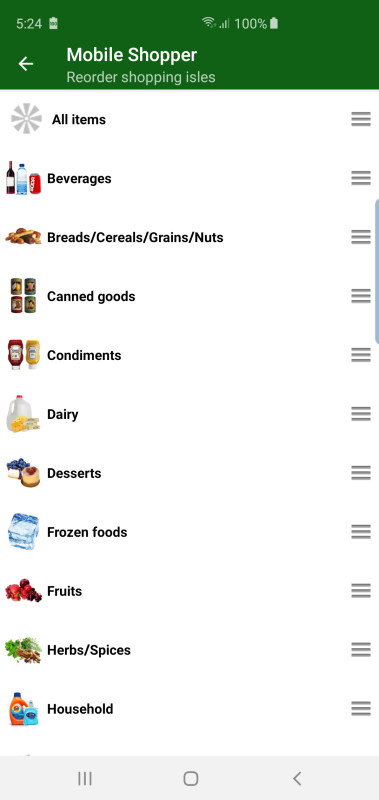
Below is the dialog for reordering the shopping aisles (the categories as they appear on the needed tab. You can change the order of the aisles by tapping and holding on the drag icon on the right hand side, dragging to the desired position, then dropping it.
About Dialog and Version History
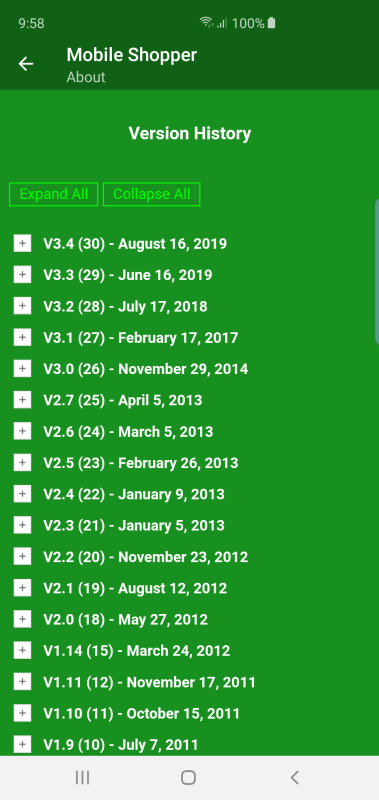
Below is the "About" dialog on the left and version history view on the right.
By tapping the "support@ideasave.com" link you can email information to technical support to help in diagnosing any problems you find. The information sent is your list of categories and items. Using the "MobileShopper" link you can launch your web browser to view the MobileShopper web site (this site) on your device. Using the "Version history" link you can view the version history for MobileShopper (on the right).
The version history view contains a list of each version since release, with details about the changes made in that version available by tapping on the + icon to expand it (tapping on the - icon to collapses it). Scroll the display via tap and drag as needed. You can expand or collapse all versions by using the Expand All or Collapse All buttons.

Help Dialog
This is the help dialog. This dialog shows a list of help topics, each of which can be expanded to view details on that topic by tapping the + icon (tapping on the - icon to collapses it). Scroll the display via tap and drag as needed. You can expand or collapse all topics by using the Expand All or Collapse All buttons.


